Crafting for the Outdoors: Durable and Weather-Resistant Projects
The allure of the outdoors, with its fresh air, sunshine, and natural beauty, has captivated humans for centuries. And what better way to connect with nature than by creating something with your own hands? Crafting for the outdoors allows us to express our creativity while enhancing our outdoor spaces with unique and personalized touches. However, unlike indoor projects, outdoor crafts must withstand the elements. This means choosing durable materials and employing techniques that ensure longevity and resilience against sun, rain, wind, and temperature fluctuations.
This article delves into the world of crafting for the outdoors, exploring a variety of project ideas that are not only aesthetically pleasing but also built to last. We’ll discuss the importance of selecting appropriate materials, share step-by-step instructions for a rustic garden bench, and offer valuable tips for ensuring the durability of your outdoor creations. Whether you’re a seasoned DIY enthusiast or just starting your crafting journey, this guide will equip you with the knowledge and inspiration to transform your outdoor spaces into havens of beauty and functionality.
Before we dive into specific projects, it’s crucial to emphasize the significance of material selection. The success of any outdoor craft hinges on choosing materials that can withstand the rigors of nature. Wood, a classic crafting material, requires careful consideration. While some woods like cedar and redwood possess natural resistance to moisture and decay, others may need treatment or protection. Metals like aluminum and stainless steel are excellent choices for their durability and resistance to rust. Additionally, consider exploring alternative materials like recycled plastics, bamboo, and weather-resistant fabrics, each offering unique properties and aesthetic appeal.
Project Ideas that Brave the Elements
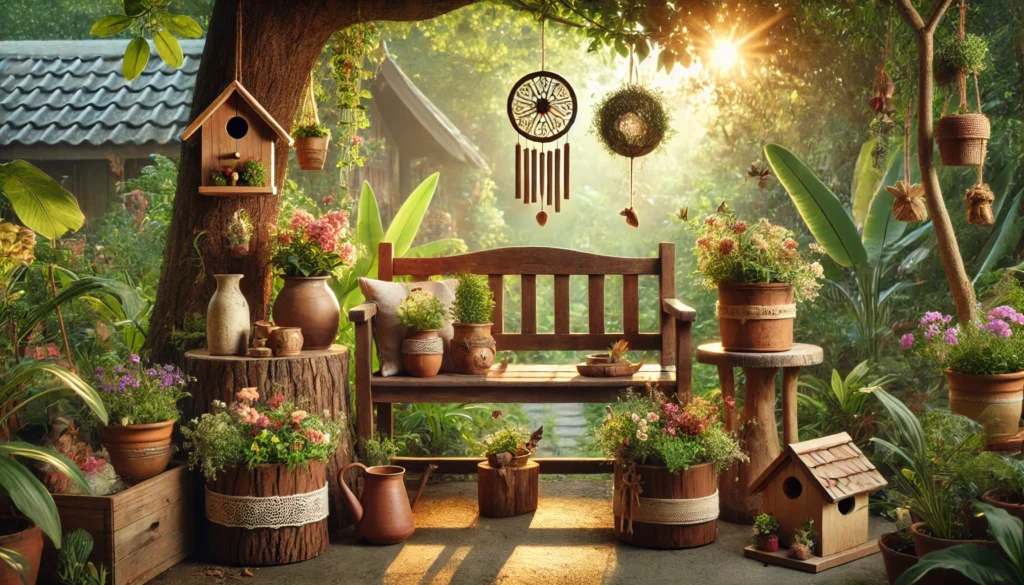
- Garden Furniture: Create inviting outdoor seating with handcrafted chairs, benches, and tables. Opt for weather-resistant woods like teak or cypress, or explore metalworking to construct sturdy and stylish pieces. Add cushions made with outdoor fabric for comfort and style.
- Planters and Flower Boxes: Enhance your garden’s beauty with unique planters and flower boxes. Consider using terracotta, concrete, or treated wood for durability. Get creative with shapes, sizes, and decorative elements to complement your outdoor aesthetic.
- Outdoor Lighting: Illuminate your evenings with handcrafted lanterns, string lights, or solar-powered lamps. Utilize weather-resistant materials like metal and glass, and ensure proper sealing to protect electrical components from moisture.
- Wind Chimes and Mobiles: Add a touch of whimsy to your outdoor space with wind chimes and mobiles. Experiment with materials like metal, glass, and natural elements like bamboo and seashells. Ensure secure construction to withstand wind and weather.
- Birdhouses and Feeders: Attract feathered friends to your garden with charming birdhouses and feeders. Use treated wood or recycled materials for construction, and ensure proper drainage and ventilation to keep the inhabitants comfortable.
Step-by-Step: Rustic Garden Bench
- Materials:
- Weather-resistant wood (cedar, redwood, or treated lumber)
- Stainless steel screws and bolts
- Wood sealant or stain
- Sandpaper
- Measuring tape
- Pencil
- Safety glasses
- Work gloves
- Tools:
- Saw (circular saw or handsaw)
- Drill
- Screwdriver
- Wrench
- Sanding block
- Instructions:
- Cut the wood: Measure and cut the wood according to your desired dimensions for the bench legs, seat, and backrest.
- Assemble the legs: Connect the leg pieces using screws and bolts, ensuring stability and squareness.
- Attach the seat: Secure the seat to the legs using screws, ensuring a flush and even surface.
- Add the backrest: Attach the backrest to the seat and legs, providing support and comfort.
- Sand and finish: Sand all surfaces to remove splinters and rough edges. Apply wood sealant or stain for protection and aesthetic appeal.
- Let it dry: Allow the sealant or stain to dry completely before using the bench.
Tips for Ensuring Durability
- Choose quality materials: Invest in durable and weather-resistant materials that can withstand the elements.
- Apply protective finishes: Use sealants, stains, or paints to protect wood and metal from moisture, UV rays, and corrosion.
- Maintain regularly: Clean your outdoor crafts regularly to remove dirt and debris. Reapply protective finishes as needed.
- Store properly: When not in use, store your outdoor crafts in a dry and sheltered area to prolong their lifespan.
With careful planning, material selection, and execution, your crafting for the outdoors projects will not only enhance your outdoor spaces but also stand the test of time. Embrace the beauty of nature and the satisfaction of creating something with your own hands, knowing that your outdoor crafts will bring joy and functionality for years to come.